
How to easily make a photo gallery wall in just 5 steps [with templates]
Now that your session is over, it’s time to decide where you are going to put your photos and what will look best in your home. Time to create a photo gallery wall you love.
- Canvas – We offer beautiful canvases stretched over varying thicknesses of wood to make it stand out more or less depending on your preference. These photos are free-floating and do not require a frame.
- Framed on Wall – Dress your photos up with stylish frames to match your home décor. We offer a variety of print sizes for you to choose from.
- Framed on Shelves, Desks, Tables – If you are renting or don’t want to put holes in your walls from prints or canvases, you can also frame your prints and place them on shelves, desks, or tables around your home. (You can also do this in addition to the wall hangings if you’d like.)
When hanging photos on your wall (framed or canvas) you can choose to hang a single photo, or a group of photos in a collage to change it up.
Where will you put your picture wall?
To start with, you want to think about the following things:
Is it a large enough space to create a feature wall with lots of pictures on? – the best walls to create a picture wall are those that have space all around so that you can really enjoy the wall without distraction.
Is the background plain and not patterned (so it doesn’t look too busy when finished)?
What room is it in? Will the pictures be appropriate for that room? (Home offices work well with motivational word art, family rooms work well with children’s art and family photos, etc….)
Decide on your gallery wall style
If you’ve ever looked on Pinterest for wall galleries you’ll soon feel overwhelmed.
There are two well defined wall gallery styles:
- The Grid Style aka salon gallery) are evenly spaced in clean straight lines.
- The Casual / Eclectic Style combines different frames, sizes and /or orientation.


Plan your wall out using these photo gallery wall ideas and templates.
If you’ve ever looked on Pinterest for wall galleries you’ll soon feel overwhelmed. Start with your space, figure out how big your spot is and decide whether you want to go big with one or two wall art photos or create a wall gallery from your photo collection. You know roughly what size you will be filling, and the types of frames you are going for, but along with these you will need extra items to do this project:
– Frames
– Photos
– Hanging tools
Measure your space and work out which layout you’re going to use.
Consider using paper templates to make sure you like it before you start hanging them up. Spacing and composition is important here.
Photo wall gallery ideas with wall gallery templates.
Small wall gallery templates
Wall gallery ideas for 3 frames
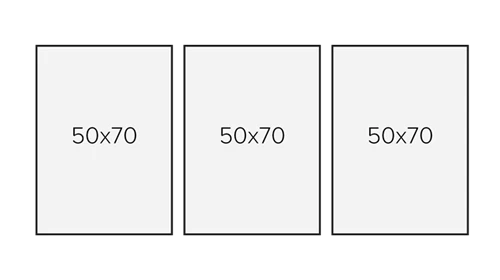
You can easily adjust the frame sizes for this layout to fit your space and works just about any where. Place frames 4 cm part and ensure they are all level.
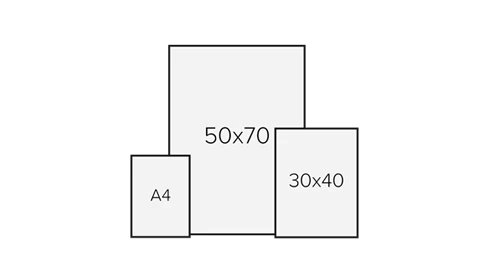
This gallery wall layout looks great on a floating picture shelf making it the easiest to change up.
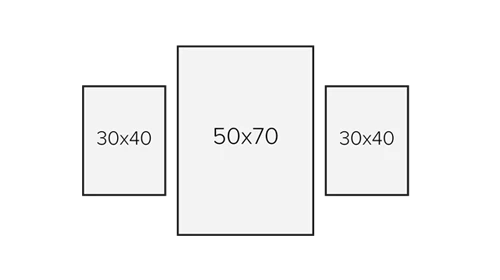
This centred wall gallery layout looks great in nurseries or above furniture. Place the frames 4 cm part = Total width 118 cm | Total height 70 cm
Medium wall gallery ideas
Wall gallery ideas for 4 frames
.jpg)
This classic grid layout works well in any space as it’s well balanced and symmetrical. You can also easily adjust your size based on your space.
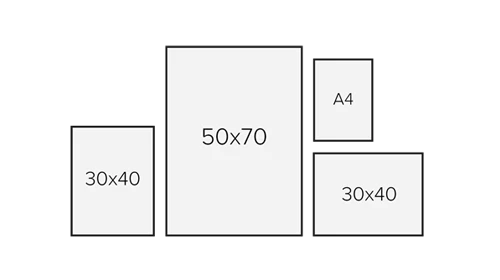
This is a great layout if you think you may want to expand it later on.
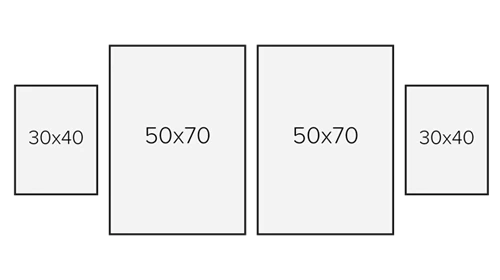
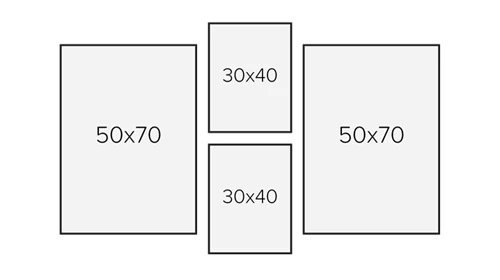
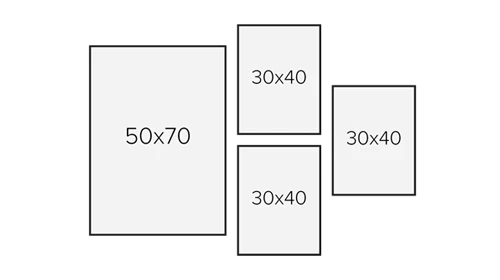
Wall gallery ideas for 5 frames
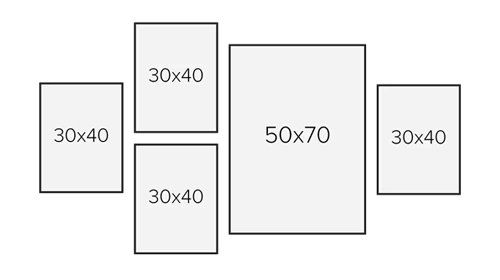
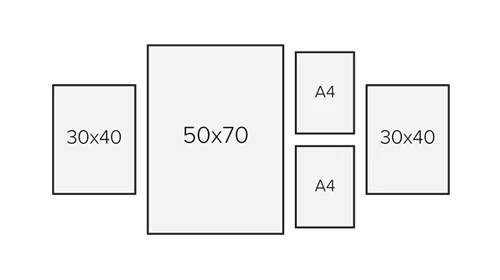
Large wall gallery ideas
Are great for dinning rooms or hallways.
Wall gallery ideas for 6 frames
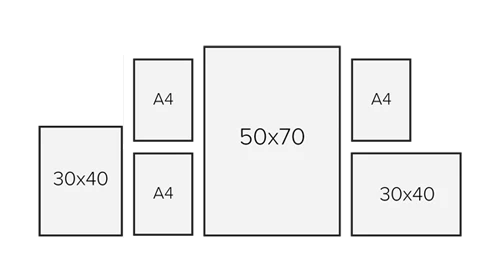
Wall gallery ideas for 7 frames
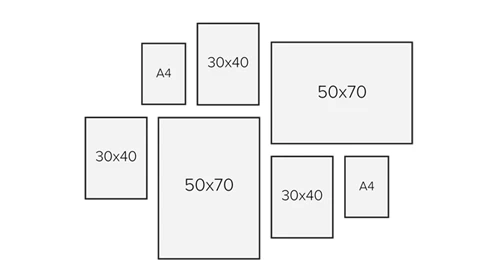
Wall gallery ideas for 8 frames
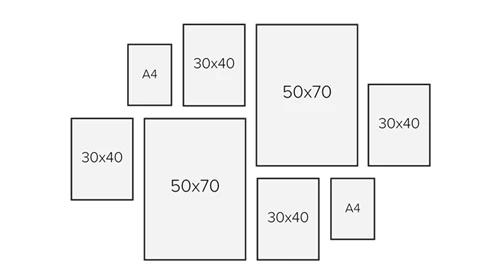
If you want to see how these look in reality, head over to my wall gallery vision board to check them out.
Fixing your pictures to the wall
When fixing your pictures to the wall. There are 3 simple methods to choose from, so pick the best method for you:
Hanging pictures by eye
When it comes to hanging a picture by eye alone, grab a friend or family member. Get them to stand a little way back from where you are hanging the picture. Then get them to tell you how it looks. You can also use a small spirit level on the underside of the picture to make sure it is straight.
Hanging pictures by paper templates
Paper templates are a brilliant cheat for hanging pictures. Print out the template that shows where your pictures will be. Mark on the template where the hook for each picture frame is (you can just poke through with a sharp knife point to mark it). Attach the template to the wall with some masking tape. Then you are ready to mark where the hooks will go. Once all the marks are in place, remove the template and add your nails or hanging hooks.
Hanging pictures by command strips
Command strips are the ultimate cheat for hanging pictures and great for gallery walls. There’s no tools needed and once they are in place, you can easily unhook the picture if you want to clean it or repaint the wall.To hang the picture:
- Wipe the wall with rubbing alcohol to make sure there’s no residue that will stop the command strip from working. If you have painted recently, wait at least 7 days before adding them.
- Separate the strips and remove one side of the liner. Add these to the frame, pressing into place firmly.
- Remove the remaining liners and press the frame firms to the wall. It may be worth marking up first where it will be going using either of the systems above to make sure it is straight.
- To make sure it sticks, temporarily remove the frame to reinforce the strips, pressing each one down for about 30 seconds.
- Leave it for 1 hour for the adhesive to bin then align the strips and press until they click. Job done!
How to easily make a photo gallery wall in just 5 steps

Choosing the best wall gallery style depends on the picture you have, the space you have and the room you have.
Instructions
#1 - Pick your location
#2 - Measure your space so you know what you're working with
#3 - Decide on your wall gallery style (how many frames and in what layout style)
#4 - Pick thematic photos that suit your wall gallery style
#5 - Hang your pictures, making sure you check your hanging points if you're using different frames
Notes
Check your hanging points, because they are different on different frames.
Recommended Products
As an Amazon Associate and member of other affiliate programs, I earn from qualifying purchases.


